


How to Add a CNAME Record in GoDaddy
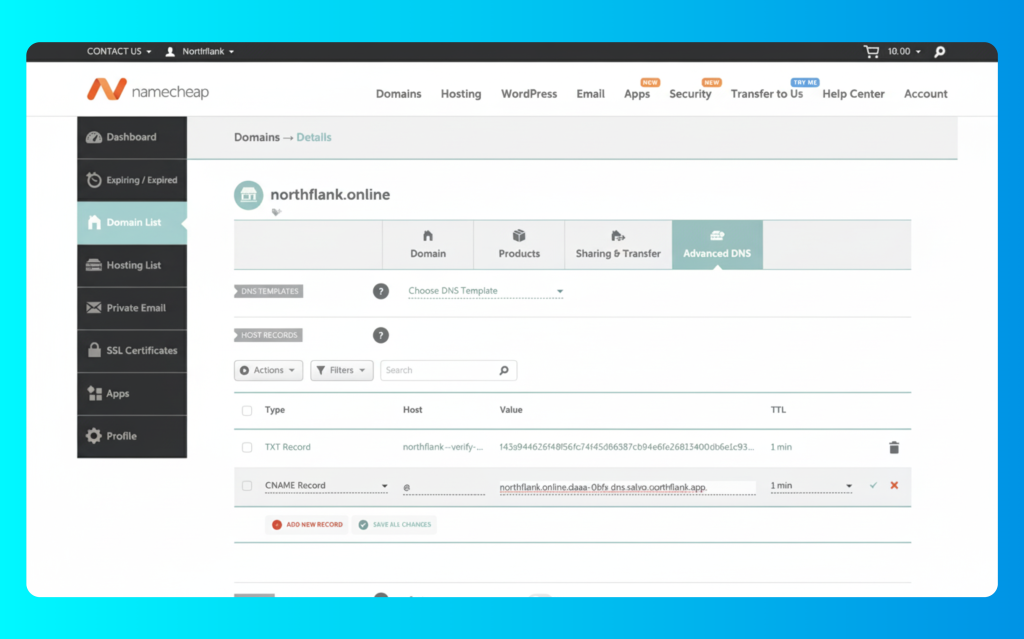
Overview With custom domain setup, you can display your review forms on your own branded domain instead of the default Feedspace link. This allows you to create a more professional and consistent user experience for your visitors. In this section, you’ll add a custom domain or subdomain (e.g., reviews.yourdomain.com). Using a subdomain...