Overview
Adding your own custom domain to Feedspace helps reinforce your brand and may improve traffic. Below is a simple, step-by-step walkthrough to get your custom domain up and running.
Step – 1 Log into Feedspace
Go to Feedspace and log into your Feedspace account.
Step – 2 Navigate to Custom Domain Settings
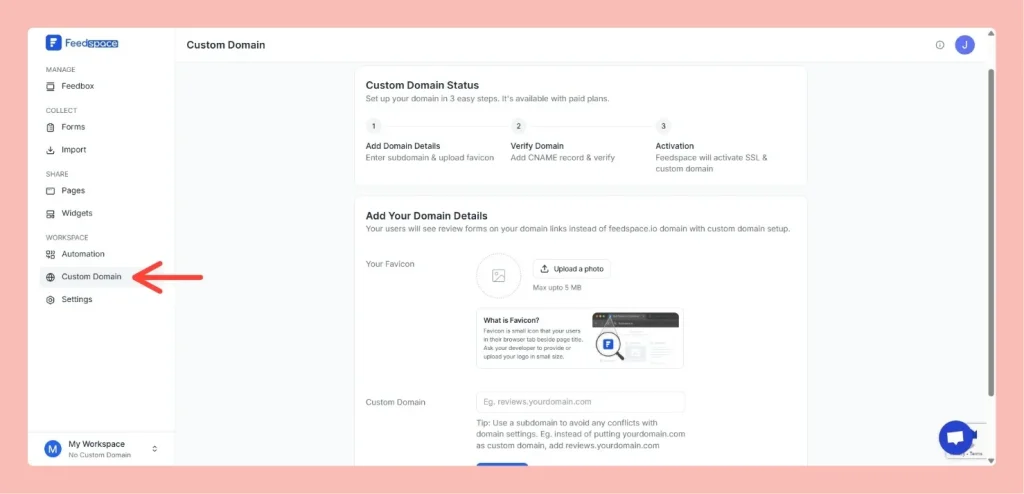
From the left sidebar, click on “Custom Domain” within the Account Settings section to begin the setup process.

Step – 3 Enter Your Domain
- In the Custom Domain field, type the subdomain you want (e.g.,
reviews.yourdomain.com
). - You can also upload a favicon for the domain – make sure the file size is under 5 MB.
Step – 4 Add DNS CNAME Record
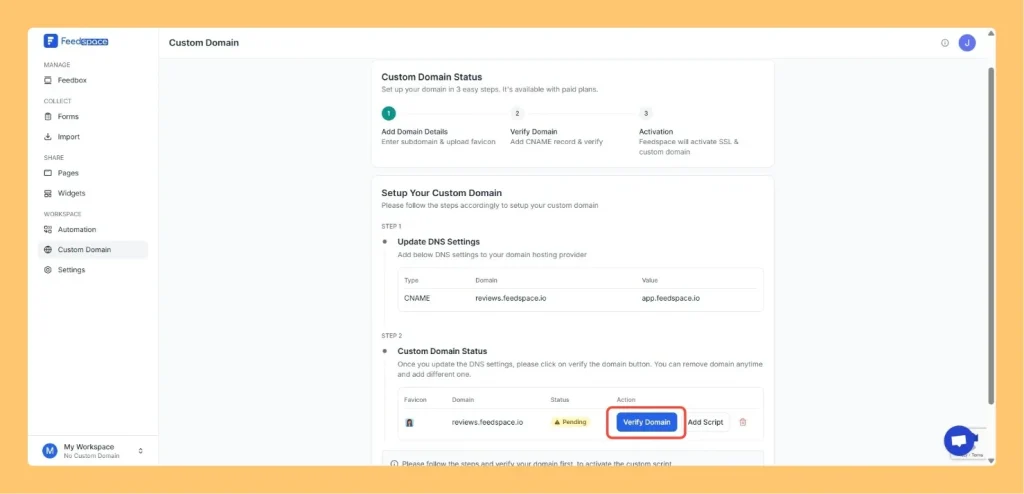
- Feedspace will generate the CNAME record details—such as Host and Target values.
- Log in to your domain registrar (where you bought your domain) and add the provided CNAME to your DNS settings.
Step – 5 Verify Your Domain
- Return to Feedspace and click Verify Domain.
- Once verified, the domain will be activated and labeled as Activated in the Custom Domain settings.

Step – 6 Wait for DNS Propagation
- DNS changes can take anywhere from 24 to 48 hours to fully propagate.
- If the activation is delayed, reach out to your domain registrar for assistance.
For a comprehensive walkthrough or personalized help, feel free to book a demo with our expert.