Feedspace Home Dashboard

How to Create a Widget in Feedspace

Last updated on October 7, 2025

Overview

Widgets in Feedspace allow you to showcase your collected reviews directly on your website. They are easy to set up, customizable, and come in different layouts to match your site’s design.

This guide walks you through the steps to create your first widget and explains all the available widget types.

Step 1 – Navigate to Widgets

  1. Log in to your Feedspace account.
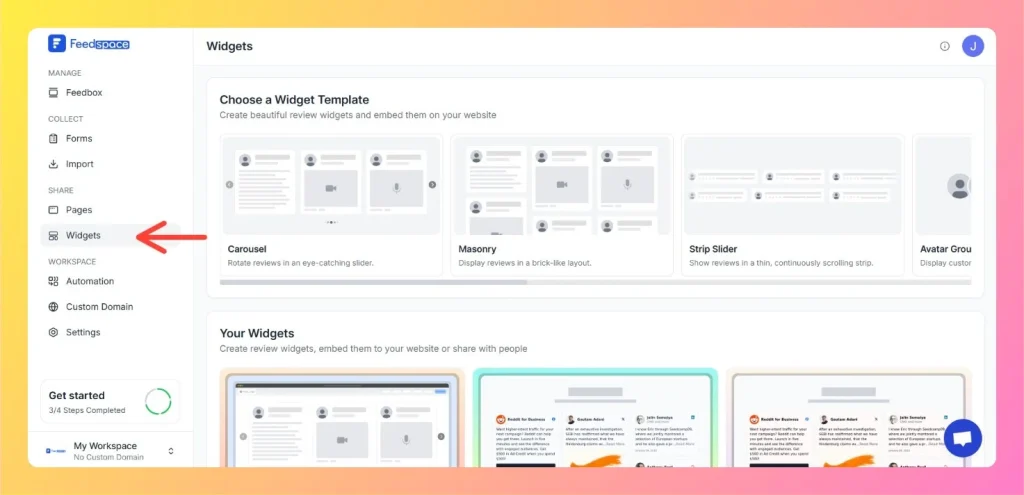
  2. From the left-hand menu, go to Share → Widgets.
  3. Here you’ll see the option to Choose a Widget Template.
Left Side Bar: Select Widgets

Step 2 – Choose a Widget Template

Feedspace offers multiple widget templates. Select one that fits your website’s design and purpose.

Available Widget Types:

  1. Carousel
    • Rotate reviews in a slider format.
    • Great for highlighting multiple reviews in a compact space.
  2. Masonry
    • Displays reviews in a brick-like grid.
    • Perfect for showcasing lots of reviews at once.
  3. Strip Slider
    • Reviews appear in a thin, continuously scrolling strip.
    • Works well in headers or footers.
  4. Avatar Group
    • Displays customer profile pictures along with reviews.
    • Builds credibility and trust.
  5. Avatar Slider
    • Highlights one review at a time with the customer’s avatar.
    • Great for storytelling-style displays.
  6. Vertical Scroll
    • Reviews scroll up and down like a news ticker.
    • Eye-catching for sidebar placements.
  7. Horizontal Scroll
    • Reviews scroll left and right continuously.
    • Works well in wide sections of a page.
  8. Floating Cards
    • Keeps a review card fixed at the bottom of your site.
    • Always visible, ensuring constant social proof.

Step 3 – Select Reviews

  1. After choosing a template, you’ll see the Select Reviews screen.
  2. Pick which reviews you want to display in your widget.
    • You can filter reviews (by source, rating, or type).
    • Use Select All if you want to include everything.
    • Manually check/uncheck reviews for fine control.
  3. Once done, click Save & Next.
Select Reviews Tab

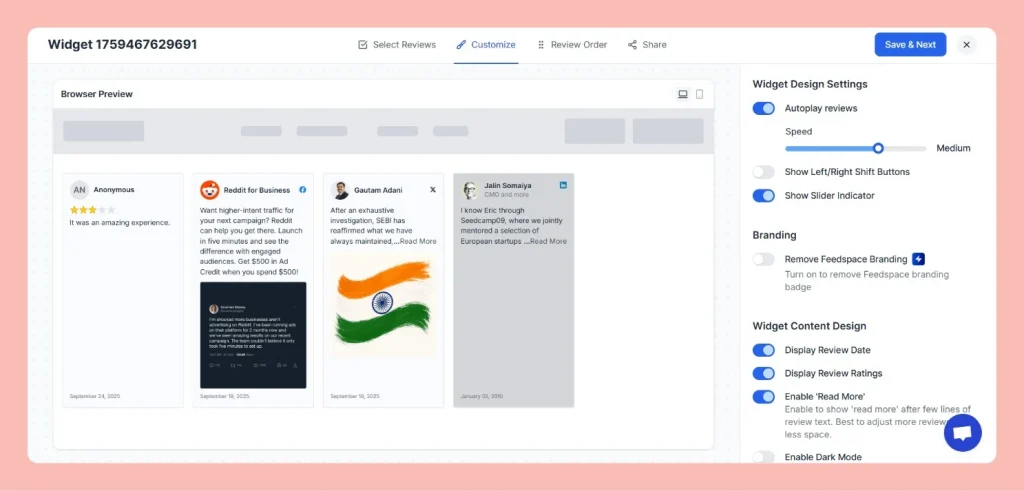
Step 4 – Customize Your Widget

  1. Once you pick a template, you can customize:
    • Colors
    • Fonts
    • Layout (spacing, size, etc.)
    • Which reviews to display
  2. Preview your widget to see how it looks.
Select Customize Tab

Step 5 – Review Order

  • Preview how the widget will look on your site.
  • Reorder reviews if needed under the Review Order tab.

Step 6 – Embed the Widget on Your Website

  1. After customizing, Feedspace will generate an embed code.
  2. Copy this code.
  3. Paste it into your website’s HTML, CMS, or page builder (e.g., WordPress, Webflow, Wix, Squarespace).
  4. Save and publish.

Your widget is now live on your site!

Tips for Best Results

  • Place widgets on homepages, product pages, and landing pages to maximize conversions.
  • Use Floating Cards for constant visibility.
  • Mix and match widget types across different pages for variety.

Creating a widget in Feedspace is as simple as choosing a template, customizing it, and embedding it on your website.

You might also find helpful

What is a Widget in Feedspace?

Overview In Feedspace, a widget is a customizable display tool that allows you to showcase your collected reviews, testimonials, or feedback directly on your website. With widgets, you can turn customer voices into social proof, helping you build trust and credibility with visitors. Instead of just collecting reviews, widgets let...

How to Embed Reviews Using Feedspace Widgets

Overview Feedspace offers an easy way to display your customer reviews stylishly on your website. By embedding reviews through Feedspace widgets, you can enhance your website’s credibility and design. With options like Carousel and Masonry widgets, you can showcase your reviews in a way that best fits your site’s look....

How to Create a Wall of Love Page in Feedspace

Steps to Create a Page Log into Feedspace Sign in with your account credentials. Go to Pages From the left sidebar, click Pages. Create Page Click Create Page. This opens the creation screen with some reviews auto-selected in the space. Select Reviews Go to the Select Review page and choose...