Organize your content effectively by creating separate workspaces, whether by project, client, or campaign. Here’s how to set one up:
Step 1: Log into Feedspace
Visit Feedspace and sign in using your account credentials.
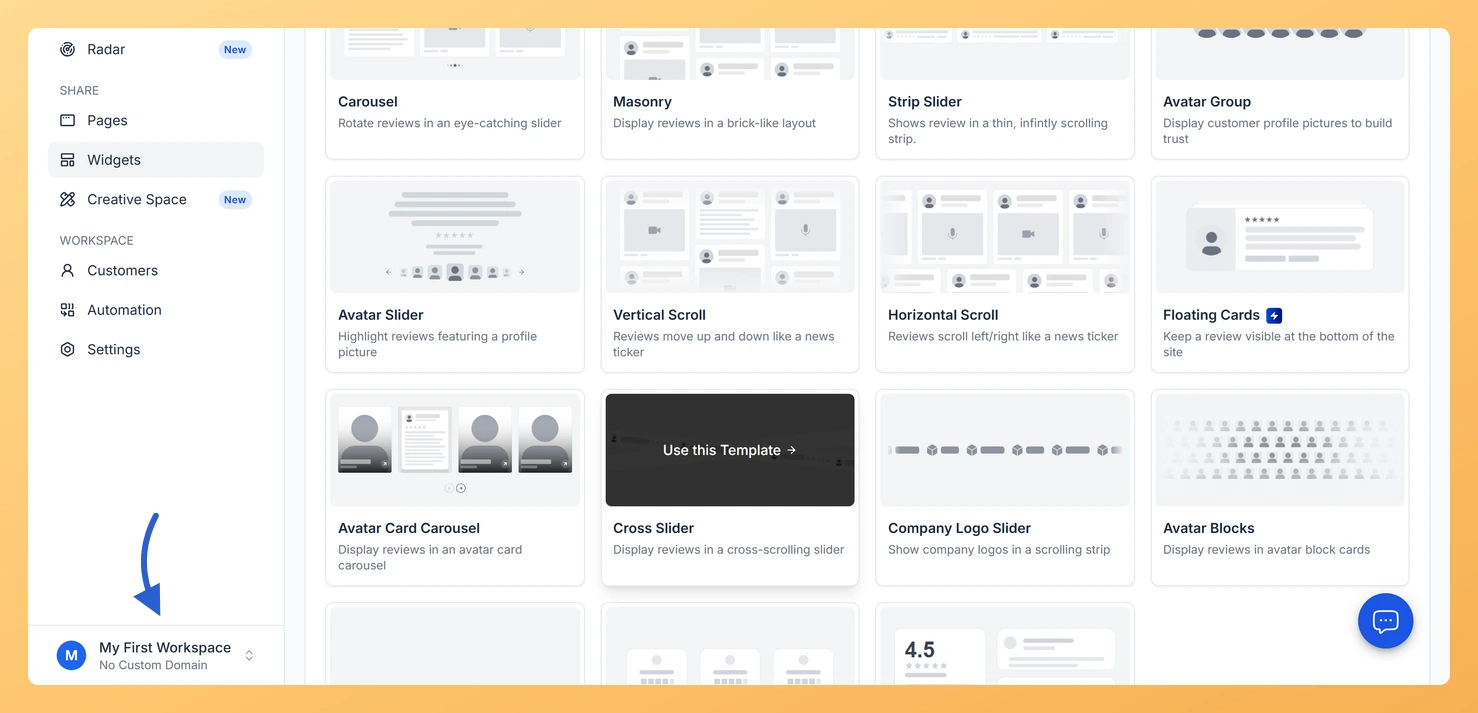
Step 2: Open the workspace switcher
In the sidebar footer, click the workspace switcher. It shows the name of the workspace you are in.
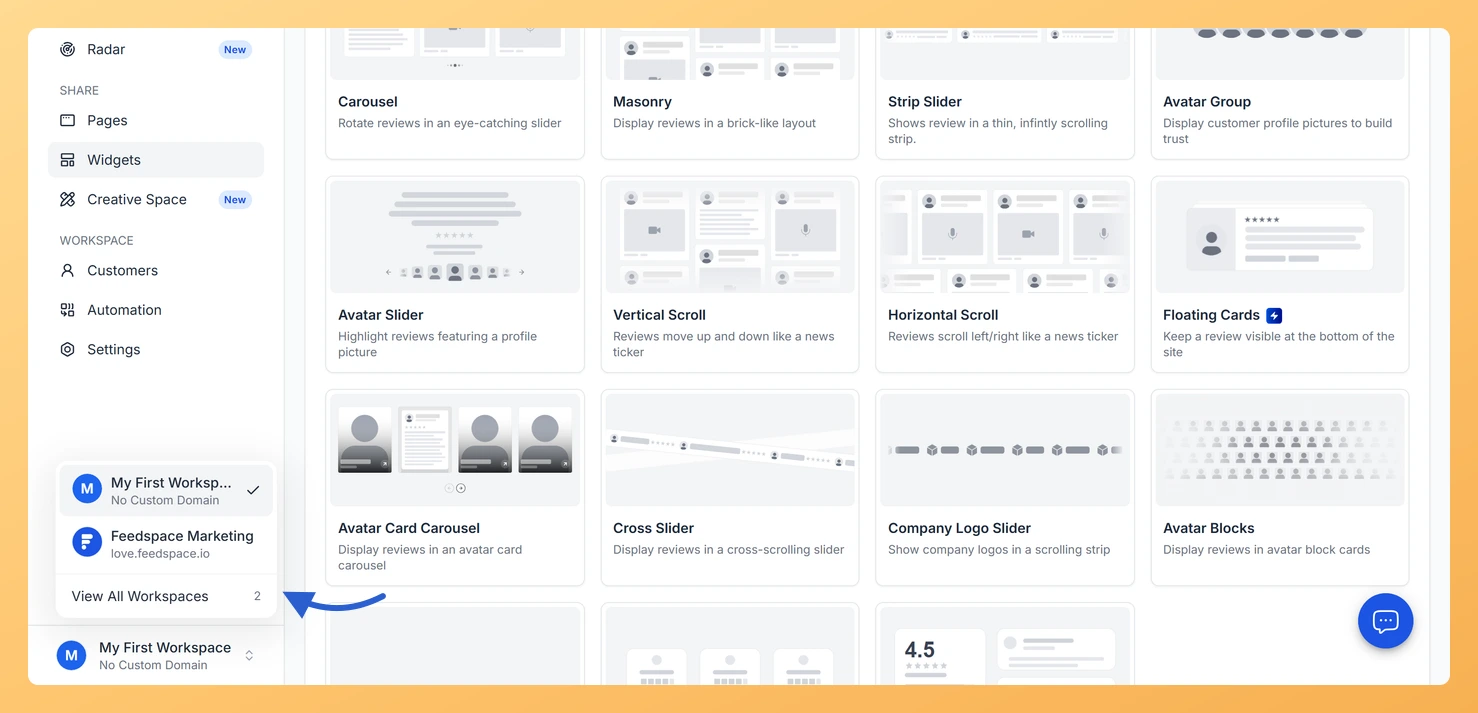
Step 3: Open the Workspaces page
Click View All Workspaces at the bottom of the dropdown. This opens the Workspaces page.
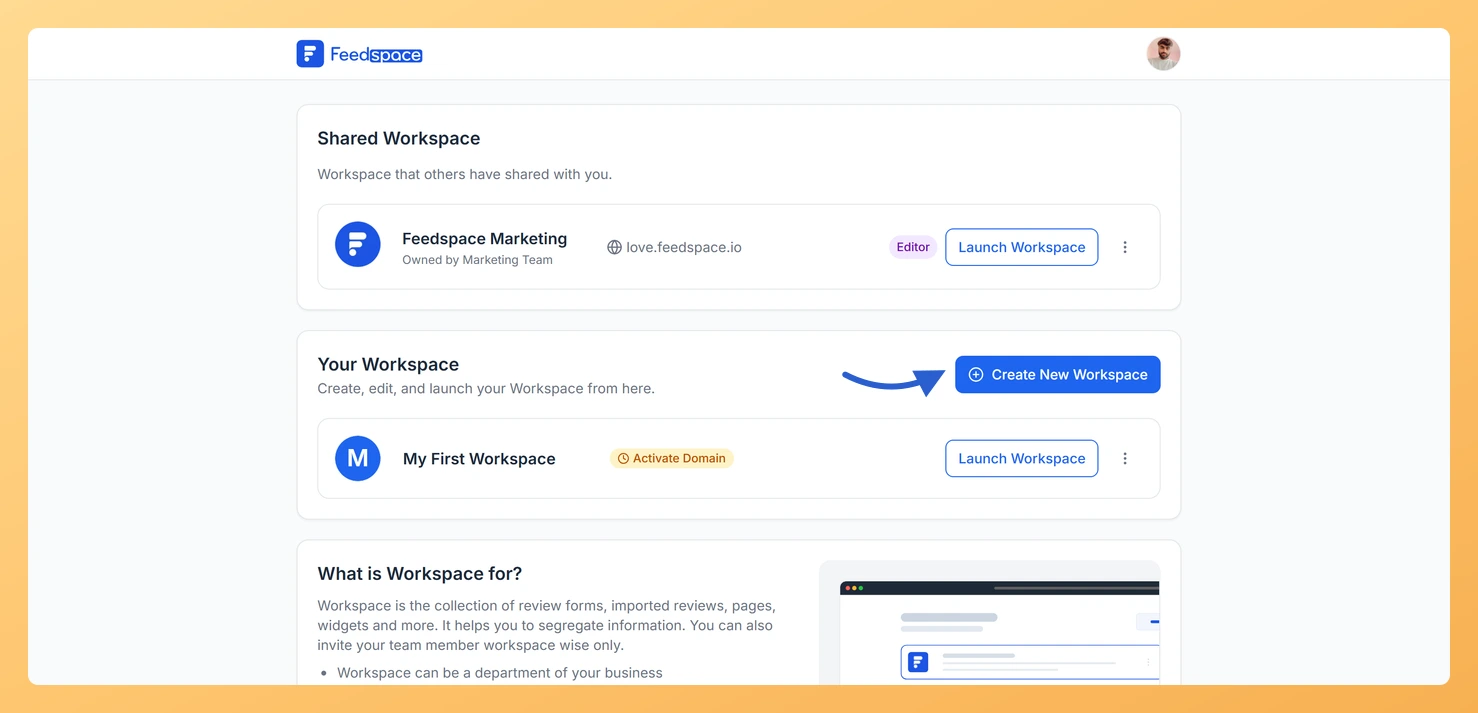
Step 4: Click Create New Workspace
Click the Create New Workspace button in the top right of the card.
Step 5: Fill in the workspace details
In the Create New Workspace modal, complete these fields:
Upload photo (optional): click it to choose a logo image file (image files only, up to 15 MB).
Workspace Name: enter a clear, recognizable name, for example “Client Project Alpha”. The Workspace URL slug auto-fills from the name and shows a green check when the slug is available.
Website URL (optional): enter your website so branding assets can be applied to the new workspace.
Step 6: Click Create Workspace
Once all fields are set, click Create Workspace to finish setup.
Step 7: Start using your new workspace
A toast appears confirming you are in the new workspace, and you land on the Feedbox page in that workspace, ready to use. You can switch back to it any time from the workspace switcher in the sidebar footer.
How to edit a workspace
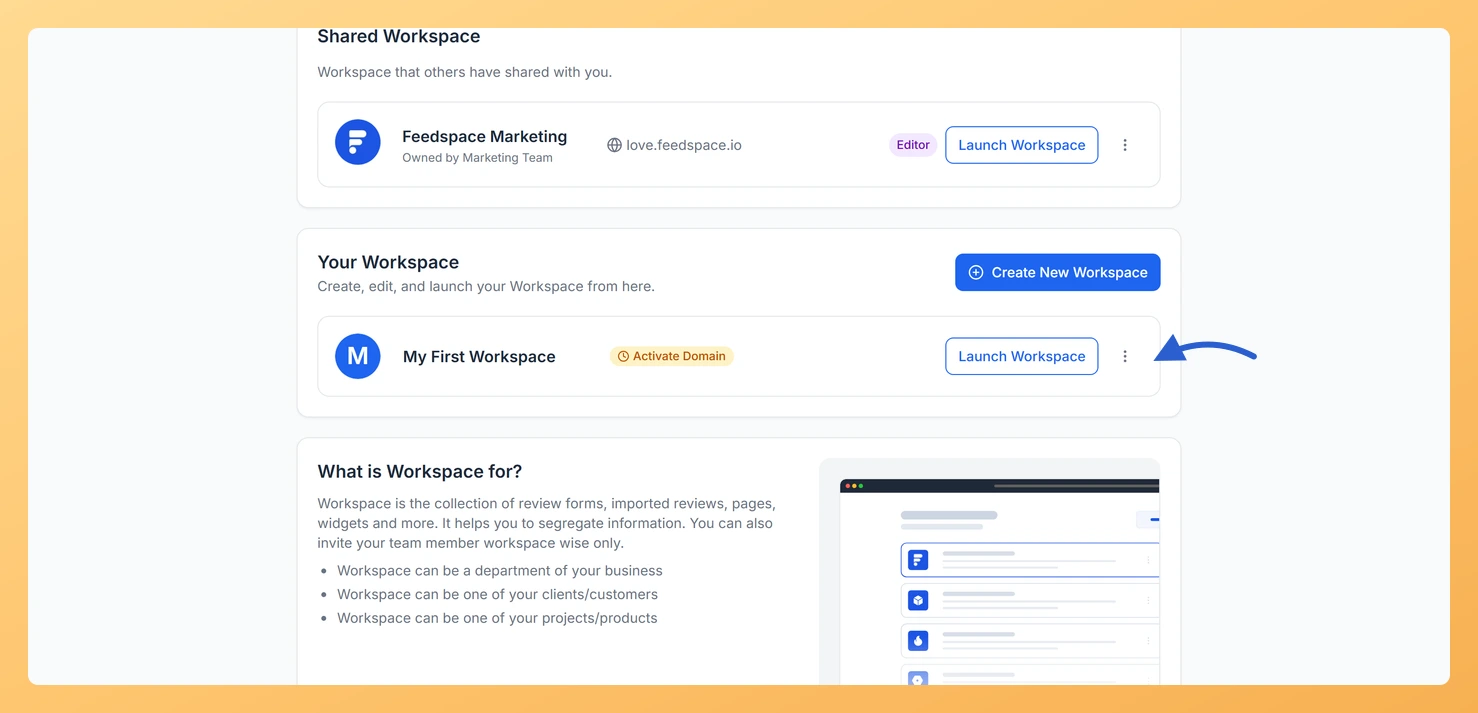
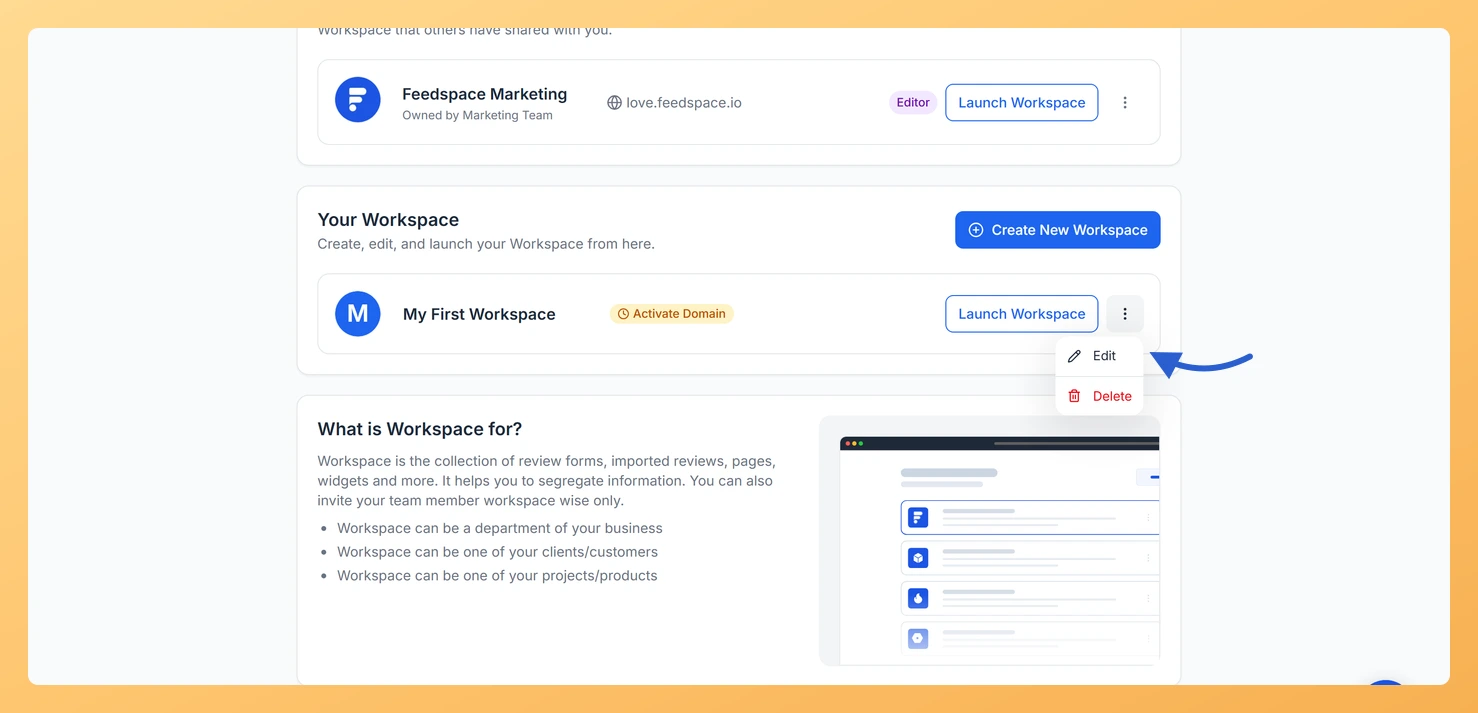
Step 8: Open the workspace menu
On the Workspaces page, find the workspace you’d like to modify. Click the more options icon on its row.
Step 9: Click Edit
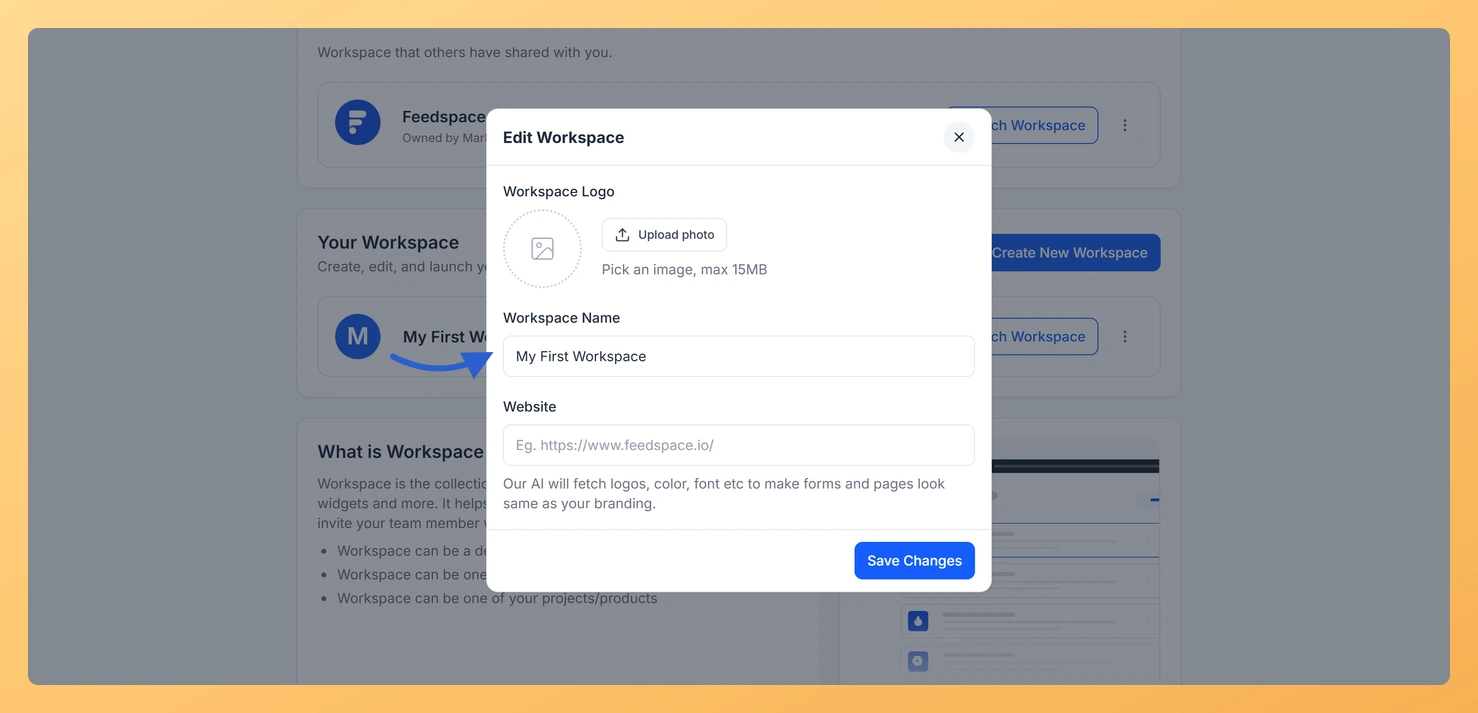
From the dropdown, click Edit to open the Edit Workspace modal. It is pre-filled with the current name, website URL, and logo.
Step 10: Update the workspace details
Change the logo, Workspace Name, or Website as needed.
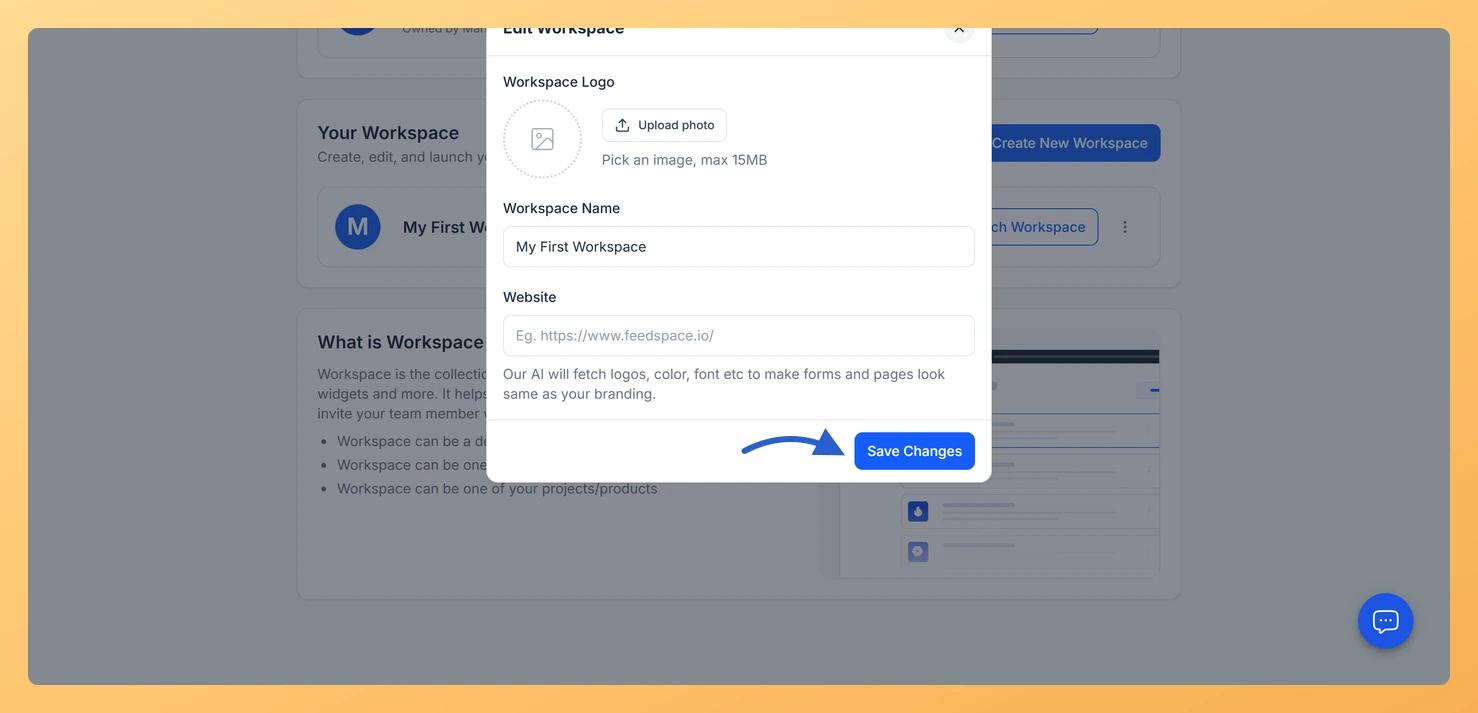
Step 11: Click Save Changes
Once edits are complete, click Save Changes. A success message appears and the workspace list updates with your changes.
Common questions
How do I add more workspaces?
The number of workspaces you can create depends on your current plan. When you reach your plan’s limit, clicking Create New Workspace opens an upgrade prompt instead of the create form. To add more, upgrade or change your plan.
You might also find helpful
What is Workspace in Feedspace?
Overview In Feedspace, a Workspace is a dedicated environment where all your review-related data and tools are organized. Think of it as a container that holds everything you need for managing testimonials and reviews in one place. A workspace typically includes: This structure helps you keep things organized and segregated,...
How to Manage Branding Assets in Feedspace
Overview Feedspace lets you customise the look of your Wall of Love and widgets through Branding Assets in your workspace settings. You can upload your logo, set brand colours, and choose a font so every testimonial display matches your company’s visual identity. Steps to manage branding assets Step 1: Open...
Learn More About Notification Settings in Feedspace
Accessing notification settings Log into Feedspace Sign in with your account credentials. Open the profile avatar menu Click your profile avatar at the top-right of the header to open the menu, then click Notifications. This opens the My Account modal on the Notifications tab. Notification preferences All notifications are sent...