Out of the box, your automation emails go out from reviews@feedspace.co with your workspace name in the inbox. On a paid plan you can switch to Send from my own email or domain, and the emails arrive from your address instead, through either your own SMTP server or your Amazon SES account.
It matters most when the customer already knows your address. A review request from the same domain that sent their invoice reads as you asking; one from a shared sender reads as a tool asking.
Steps to send from your own address
Step 1: Open the automation editor
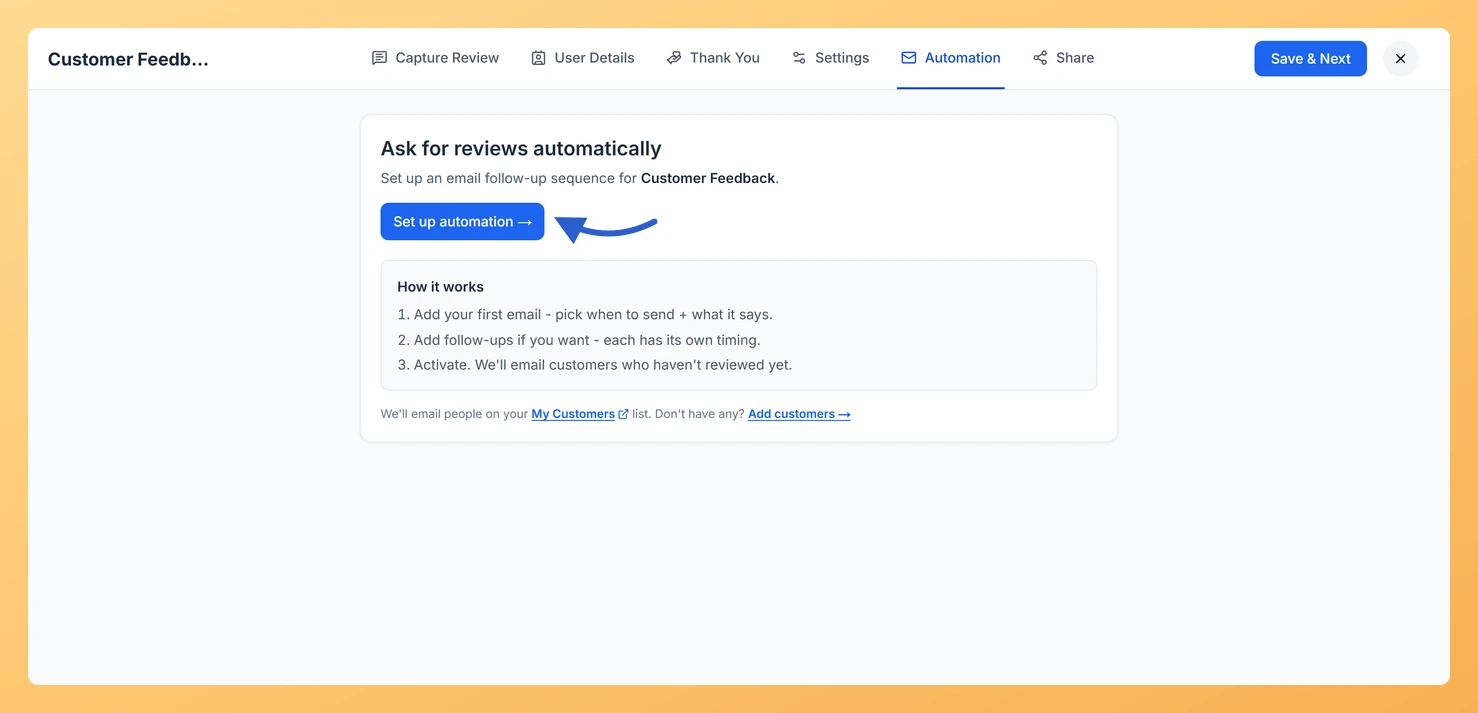
Click Forms in the left sidebar and click Edit on the form card, then open the Automation tab and click Set up automation. Scroll past Who should we email? and Email sequences to the last section, Who’s it from?.
Step 2: Choose who the email comes from
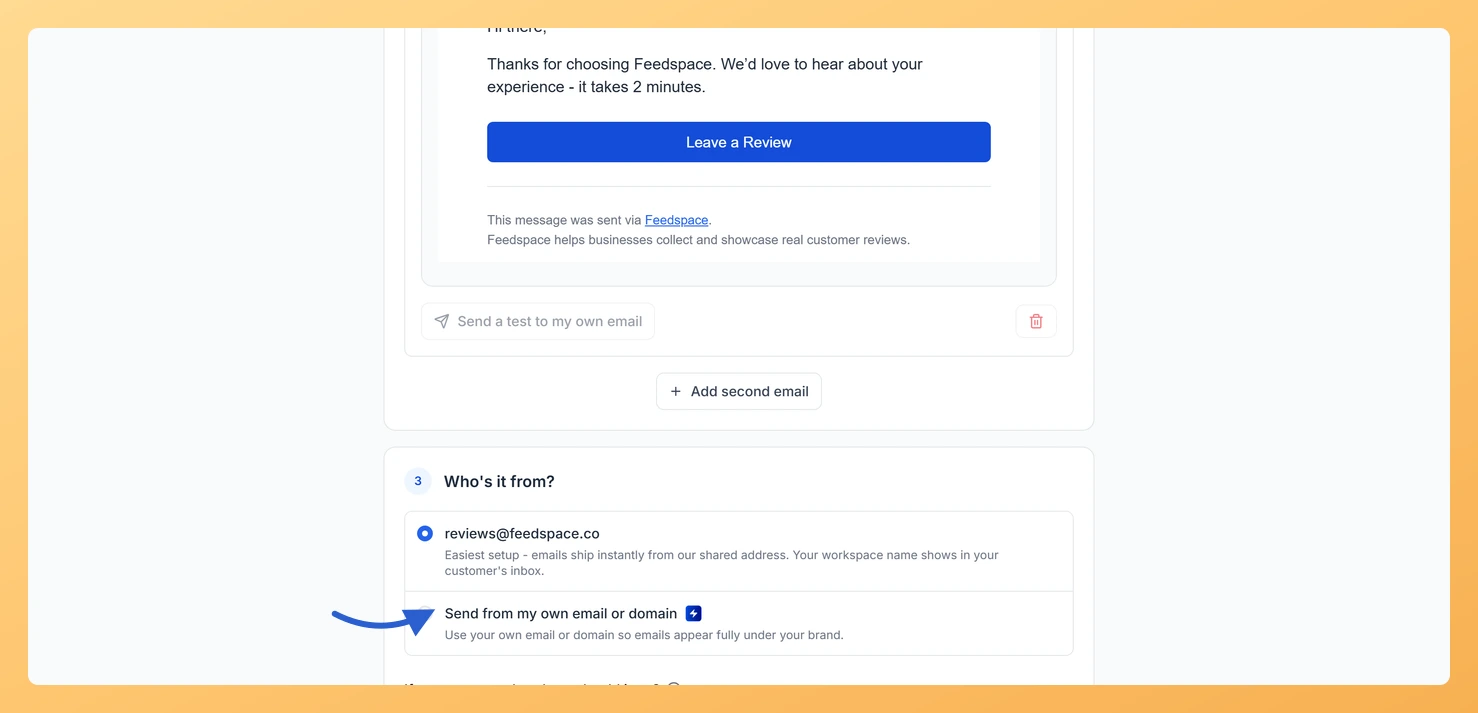
Two choices sit here. reviews@feedspace.co is the default and needs no setup. Pick Send from my own email or domain instead, then choose the SMTP or Amazon SES tab depending on how you send email today.
Step 3: Fill in your sending details
On the SMTP tab: Send-from email address, “From” name, SMTP host, Port, Username, Password, and Encryption, which offers TLS (recommended), SSL, or None. Your password is encrypted before Feedspace saves it.
On the Amazon SES tab: Send-from email address and “From” name as above, plus AWS Access Key ID, AWS Secret Access Key, and AWS region. The address, or its domain, has to be verified in your SES account already.
Step 4: Test the connection
Click Test connection. A pass reports back straight away, and a failure tells you what went wrong, whether that is a rejected password, a host it could not reach, or a TLS setting to change. This is not optional: Activate stays greyed out until the test passes.
Step 5: Say where replies should go
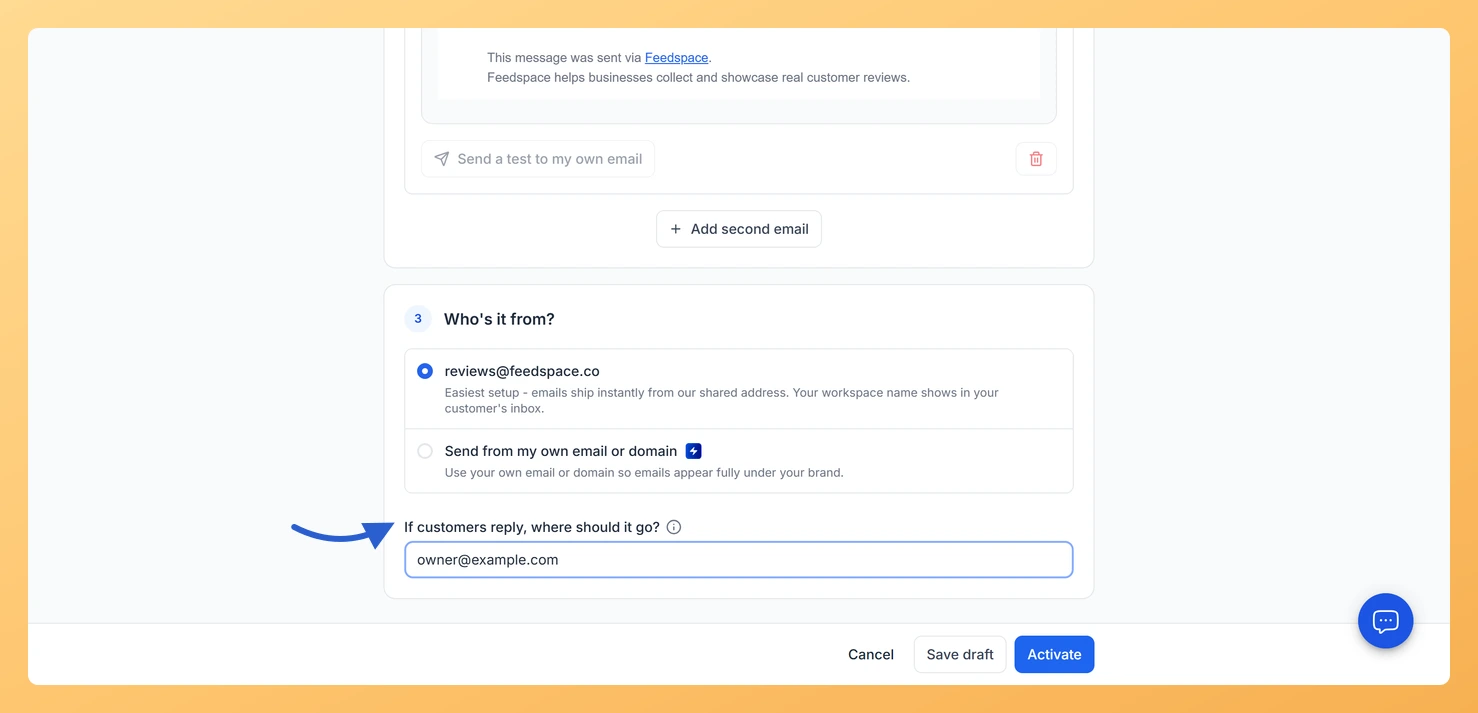
Under If customers reply, where should it go?, put the address that should receive replies. It uses your Feedspace account email unless you change it, so point it at a shared inbox if a team handles the answers.
Step 6: Save or go live
Save draft keeps the settings without switching anything on. Activate starts the automation, and it needs at least one customer on the list as well as a passing connection test.
Do I have to re-enter my password every time I edit the automation?
No. Your SMTP password and AWS secret key are saved encrypted and are never shown again. The SES tab tells you a secret key is already saved, and you only type one in when you want to replace it.
Will I still see who opened the emails?
Opens and clicks on the review link, yes. Bounces and spam complaints, no: those come back only when Feedspace sends through its own servers, so check your email provider’s dashboard for bounce reports.
You might also find helpful
What Is the Automation Tab on My Feedspace Review Form?
The Automation tab turns your review form into a self-running testimonial collection engine. Instead of manually following up with customers, you build a timed email sequence once and Feedspace handles every send automatically. Add your customer list, write your emails, and activate. The rest runs without you. What You Can...
How Do I Set Up Email Sequences on My Feedspace Review Form?
An email sequence is a series of timed messages sent automatically after a customer is added to your automation list. Each email has its own delay, subject, body, and call-to-action button. Once configured and activated, the sequence runs without any manual input, turning your customer list into a steady stream...
How Do I Activate My Feedspace Form Automation?
Every Feedspace form automation starts in Draft mode, which means no emails are sent until you explicitly activate it. Activating moves the automation to Active and begins enrolling customers according to the sequence you have configured. Before activating, Feedspace shows you a preview of how many customers will be enrolled,...